School Projects

Fun Projects

Tuesday, September 29, 2015

Soup Making

Well, it seems that my project lethargy continues, so my son has stepped up to the plate to fill our family's quota of "making stuff."  In his history book he is reading about how Christianity spread out from the former Roman Empire into the rest of Europe.  The book had a discussion on monastic life and suggested that the student make a "Monk's Meal" to get a little idea of what it felt like to be a medieval monk.  Ian jumped all over that idea, He decided to make a simple Lentil Soup.
 He practiced some knife skills, cried a few tears over the onions, reviewed doubling fractions (the recipe was way too small), and produced a pretty tasty end product.
Bonus for me: I didn't have to make supper!  Next time I'm going to teach him the medieval habit of "washing up."

Lentil Soup Recipe:
1/4th cup Olive Oil\
1 onion, chopped
2 carrots, diced
2 stalks celery, diced
2 cloves garlic, minced
1 bay leaf
1 tsp. dried oregano
1 tsp. dried basil
8 cups water
1 cup dried lentils
1 can (14.5 oz) can crushed tomatoes
1/2 cup spinach, rinsed and thinly sliced
2 TBSP. vinegar
salt and pepper to taste

1. In a large soup pot, heat the oil over medium heat.  Add onions, carrots, and celery; cook and stir until onions are tender.  Stir in garlic, bay leaf, oregano, and basil; cook for 2 minutes.
2. Stir in lentils, and add water and tomatoes.  Bring to a boil.  Reduce heat and simmer for at least 1 hour.  When ready to serve, stir in spinach and cook until it wilts.  Stir in vinegar, and season to taste with salt and pepper. Makes 6 servings


Friday, September 25, 2015

Science Experiment #28

I'm gonna be honest with you.  I seem to be suffering a severe lack of motivation these days.  My get-up-and-go, as they say, got up and went.  I've been managing to stay mostly caught up with the laundry and dishes, but not much else.  I think it is a case of post-Aestas (Latin for summer) Depression.  I'll recover as soon as the leaves start to change color and the fall chill gets the blood moving again.

Despite all that, I did manage to get the kids going on their weekly science activity.  I gave them buckets and sent them out into the yard to collect seeds and fruits.  They wandered around for a while finding seeds and other things (The most notable "thing" was a bat-the mammal not the toy- huddled in a ball on the ground.  Thankfully they did not touch the bat.  When I went back later to check on the bat it was gone, so I have no idea what was going on there.).
After they had collected for a while we brought their findings inside and organized them on a large sheet of paper.  Once we had them all separated we counted 16 different types of fruits and seeds.
We talked about all kinds of seed words like "legume" and "pome" and "fruit" and "nut" and "grain", each of which they were able to find an example of in their collection.
It was a nice and quick little nature study, and didn't require much productivity from me, so it worked out perfectly.

Happy science, everyone!

Thursday, September 17, 2015

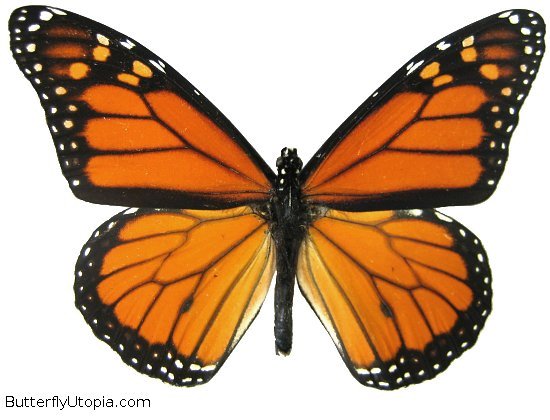
Science Experiment #27: Hatching a Butterfly

Image found at https://networkofideas.wordpress.com/2010/11/01/the-monarch-butterfly-vs-the-viceroy/

This week's science experiment  actually started several weeks ago, when I spotted a caterpillar on the sidewalk near my Butterfly Weed plants.  It was a rather distinctive color, so I immediately began to investigate.  I was hopeful because two years ago the kids and I went on an epic "Search for a Monarch Caterpillar" which ended in failure.  Last summer we also kept our eyes open whenever we were near milkweed plants, hoping to find a caterpillar we could raise, but again we were unsuccessful.  Then wouldn't you know, here was the very creature we had been searching for two years for, crawling along in the middle of the sidewalk.  I quickly gathered the kids and we collected our specimen.  Ian made a quick tour of the neighborhood to search for milkweed plants to gather and I ventured into our basement to dig out our dusty bug cage.
For the next few days the caterpillar wandered around inside the cage, doing what caterpillars do: eating.  Then after about 3 days (I know, I should have been keeping a journal of observations or SOMETHING, so I could be more precise and scientific) we made one of our random observational visits and the caterpillar had attached itself to the side of the cage and entered its pupal stage inside a green chrysalis.
After that nothing happened for about 10 days, except that we pulled the dead milkweed plants out of the cage so that we could see better.  On the 10th, or possibly the 11th day, we observed that the chrysalis was beginning to change color, and by the 14th day it had become clear and we could see the colors of the monarch butterfly inside.  He was about to hatch!  The only problem was, we were getting ready to head out the door that morning to attend our homeschool group, so we were afraid we'd miss the culmination of our experiment. There was nothing to do but pack up our little pet chrysalis in the car and headed off.  Midway through the morning "Orangy" (affectionately named by Brynn) hatched out of the case and all the kids got to check on him as his wings hung down and began to fill out and his body transitioned to the shape we are familiar with.  It was all very exciting!
A website I checked on the subject of raising monarch butterflies said that we shouldn't release our butterfly into the wild until the day after it hatched, so since Orangy didn't seem inclined to fly anyway we kept him in the cage until yesterday.  We carried the cage outside and set it down on the patio and then waited to see what happened.  Nothing.  He just sat.  Eventually the kids and I headed off to other tasks and eventually the butterfly flew away.  Thankfully it was a very unemotional parting.

Tuesday, September 15, 2015

Summertime Stepping Stones

Hello!  I'm still here!  Well, I wasn't here for a while (let's call it "due totechnical difficulties"), but I'm back now.  So, to catch up: summer was good.  We had lots of adventures and fun times with friends and family.  Now school has started again and we are getting back into that routine.  But, before we leave summer completely behind I thought I'd share some photos from one of our annual summer projects: Hand Print Stepping stones.
The process doesn't change much from year to year: I go to Hobby Lobby and buy the mix, we add water and stir, dump the mix into the mold, insert hands, remove hands, decorate, and let dry.
This year one thing did change, however.  Cam was actually willing to have his hand printed and didn't scream like a banshee when it was his turn.  It was a developmental milestone.
Once these stepping stones were dry they joined the stepping stones from previous years in lining my backyard flower bed.  It's fun to see the kids wander from stone to stone, finding their baby hand prints and laughing at how they don't fit any more.  It's a summer tradition I am really glad I started and I intend to keep it going forever (or until my adult children refuse to return home in the summertime to cooperate).

P.S.  To check out previous stepping stone projects click here, here, here, here, and here.

Monday, August 17, 2015

Aaron's Bridge to Somewhere

This is our swamp.  I know that when most people brag about their properties or write descriptions for real estate advertisements they don't announce that their yard is bounded on one side by a swamp, but that is the case in our yard, and we embrace it.  Except the mosquitoes that fly out of the swamp.  We squash those.
This swamp separates us from our neighbor to the west, which happens to be an overgrown empty lot.  The lot has been for sale for as long as we have lived in our house, and as far as we know there has never been the slightest bit of interest in purchasing it.  We don't really mind having no human neighbors in that quarter - the peace and quiet is nice - but we do have an interest in the property (although not buying).  You see, the road our house faces is very busy and isn't a good place for young children to be riding their bikes but the road in front of the empty lot is much quieter and is a wonderful road for riding.  Aaron the Engineer decided that it would be fun and practical to build a bridge across the swamp so that the kids could cut through to the side street and ride their bikes in safety.
It took a few weekends, but the bridge is finished now and the kids are enjoying the adventure of using it to go on little roadtrips together.

Thursday, August 13, 2015

Science Experiment #26 - Is it Art or Science?

Is it really the middle of August already?  Shocking!  The past few weeks have been filled with fun because some of my relatives, who live in Germany, have been visiting this month and we've been going to baseball games and the beach, having sleep overs and bonfires, and just getting together often.  As a result of all this family fun time, we have not been doing our weekly science experiments very regularly, but this week we are getting back on track.

I found today's experiment on Pinterest, and it looked simple enough, so I didn't even follow the link.
Image found here
The only problem is, it's a little bit tricky to decide if this is an art lesson or a science lesson since you use a pendulum to create a painting (I guess that makes it a STEAM lesson)!  I turned to Youtube to up the science factor and let the kids watch several movies (this one and this one) to illustrate what a pendulum is and how it works.   Then we made our own pendulum using a camera tripod, some string, and glue bottle cut in half.
We filled the glue bottle with tempera paint, opened the cap, and set the pendulum swinging.  It turned out to be a bit more tricky than the picture made it look, because I couldn't get the paint to flow with any sort of consistency out of the bottle top.  One second it would be dripping only occasionally 
and then suddenly it would start streaming so quickly that the paint would begin to puddle and ruin the design.
We did get it to work well enough to illustrate the pattern that swinging pendulums make, but we sure didn't make any works of art.  We'll call it a partial success.
Photo credits go to Ian.  He manned the camera while I tried to manage the glue bottle.

Happy science, everyone!

Monday, August 10, 2015

Controlling the Collections

A few months ago we rearranged the girls' bedroom.  It was a good thing because it allowed the furniture that they needed (beds and dressers) to fit more efficiently while still leaving them plenty of space on the floor to play.  What it did NOT do, however, was provide space for their rapidly growing collection of treasures.  What no one tells you when your cute infant daughter first arrives in your home is that she will collect VAST amounts of "things", all of which are labeled "Indispensable and Precious Treasures" and all of which must be kept forever and prominently displayed on every available surface, regardless off how full those surfaces already are.  When you have a second cute infant daughter the problem only gets worse.

These treasures were the source of many mother-daughter disagreements, which lead to discussions like this one: "This acorn from last year is not worth saving."  "YES IT IS!! IT IS MY FAVORITE  ONE AND DADDY GAVE IT TO ME!!" "Could we get rid of the other acorns then?  You can keep just the special one."  "NO, THEY ARE ALL VERY, VERY, VERY SPECIAL!!"  Eventually the acorn problem was worked out to nobody's satisfaction and mother and daughter moved on to the next precious stack of scrap paper.  Repeat discussion.

After too many repetitions of these arguments it became clear that some sort of solution needed to be found in order to protect and display truly special (and fragile) items from being broken and buried under mounds of less desirable junk (the mom's opinion, not the child's).  A trip to IKEA provided the much needed shelving and some tips from Aaron provided the know-how to properly install them.  (Yes, I did it myself.)
The girls were so thrilled to finally have a place to put their pottery pieces that they willingly allowed me to remove several stacks of old papers and even some dead leaves from their bookshelf.  What they weren't willing to give up was moved to some new storage boxes (also from IKEA - I should get some sort of store credit for all this endorsing) that fit under their bed.  I might not agree with the girls' "what to save" policy, but at least i don't have to look at it any more.

On an unhappy note, the little table no longer looks like it does in the pictures.  The collections have begun again and there isn't much table top in sight.  Oh well.